Most zines are bound through the centre fold, either with a long-reach stapler (two staples about 2 inches from the head and tail) or with a three-hole pamphlet stitch using a needle and thread. Loose sheets and French folds are bound at the spine edge instead, with side staples and tape or a Japanese stab binding. A rubber band in notches at the fold is the quickest no-tool option.
In this guide
- Two families: fold bindings and edge bindings
- The seven bindings at a glance
- 1. Long-reach staples
- 2. The foam-board staple trick
- 3. Side staple and tape spine
- 4. Three-hole pamphlet stitch
- 5. Five-hole stitch with a wrap cover
- 6. Japanese stab binding
- 7. Rubber band and twig
- Creep: why inner pages stick out
- Which binding should you choose?
- Go further
Binding turns a stack of folded sheets into a zine. You need nothing more than a stapler, a needle and thread, or a rubber band, and each method changes how the zine feels in the hand: crisp and functional, soft and handmade, or deliberately rough.
This guide compares seven bindings, explains which zines each one suits, and walks through the two you will use most often. If you are making a one-sheet mini zine, you need no binding at all; the single cut and folds hold it together.
Two families: fold bindings and edge bindings
Every zine binding belongs to one of two families, and choosing between them is your first decision.
- Fold bindings go through the centre fold of nested folded sheets. Staples and pamphlet stitches are fold bindings. They need a page count in multiples of four, and the zine opens flat in the middle.
- Edge bindings go through a stack of single sheets near one edge. Side staples and Japanese stab binding are edge bindings. They work with any page count and with single-sided sheets, but the pages do not open quite as flat.
The seven bindings at a glance
| Binding | Family | Difficulty | Time | You need | Best for |
|---|---|---|---|---|---|
| Long-reach staples | Fold | Easy | 5 min | Long-reach stapler | Editions, any booklet |
| Foam-board staple trick | Fold | Easy | 10 min | Ordinary stapler, foam board | Booklets without special tools |
| Side staple and tape spine | Edge | Easy | 15 min | Stapler, cloth or paper tape | Single sheets, thick zines |
| Three-hole pamphlet stitch | Fold | Medium | 15 min | Needle, thread, awl | Handmade booklets |
| Five-hole stitch with wrap cover | Fold | Medium | 35 min | Needle, thread, awl, card | Taller or card-covered zines |
| Japanese stab binding | Edge | Advanced | 45 min | Awl, needle, thread, clips | Loose leaves, French folds, art zines |
| Rubber band and twig | Fold | Easy | 10 min | Rubber band, twig or pencil | Quick, playful, workshops |
1. Long-reach staples
A long-reach stapler has a deep throat, usually around 12 inches, so it can reach the centre fold of any Letter or A4 booklet. It is the single best upgrade a zine maker can buy, and a basic one typically costs around $15–25.
- Nest your folded sheets in order and tap them square.
- Open the booklet flat, outside facing up, and slide it under the stapler so the head lands exactly on the crease.
- Set the stapler’s depth guide if it has one, so every copy lines up.
- Staple twice: about 2 inches (5 cm) from the head and from the tail on a half-letter or A5 zine.
- Fold closed and press the spine.
2. The foam-board staple trick
No long-reach stapler? An ordinary one will do.
Open the stapler fully so it works like a tacker. Lay the booklet open, outside up, on a piece of foam board or thick corrugated card. Push a staple straight through the fold into the foam. Lift the booklet off, then press each staple leg flat from the inside, starting from its tip. Firm foam gives the neatest legs.
3. Side staple and tape spine
For stacks of single sheets, or for zines too thick to fold well, staple through the front near the spine edge and cover the staples with tape.
Place three staples about 0.25 inch (6 mm) from the spine edge, then fold a strip of cloth tape, washi tape or paper tape around the spine to hide them. Keep your page content at least 0.5 inch from the bound edge, because side-bound pages do not open all the way.
4. Three-hole pamphlet stitch
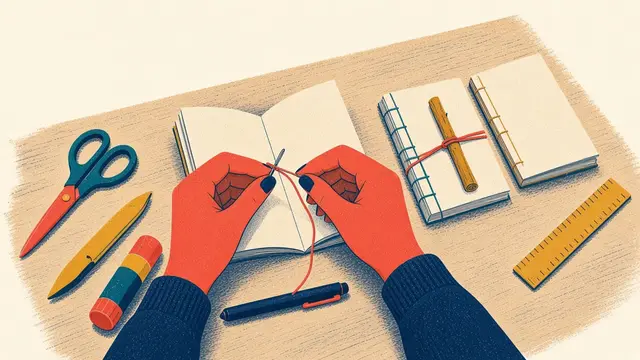
The pamphlet stitch is the classic sewn binding: three holes in the fold, one length of thread, one knot. It takes about fifteen minutes the first time and ten after that, and it gives a softer, handmade feel than staples.
The short version: pierce three holes in the fold (one in the middle and one about 1 inch from each end), go out through the middle hole leaving a tail inside, in through the top hole, along the inside past the middle and out through the bottom hole, then back in through the middle and tie a square knot around the long stitch. The full pamphlet stitch tutorial walks through it step by step with the knot and the common mistakes.
5. Five-hole stitch with a wrap cover
For taller spines, thicker zines or a card cover, use five evenly spaced holes. The path is the same idea extended: start inside at the middle hole, work out to one end, back across to the other end, and finish in the middle, tying around the long inside stitch.
A wrap cover is a single sheet of card folded around the outside of the booklet and sewn on with the inside pages. Keep the card’s grain parallel to the spine so it folds cleanly; our paper guide explains how to find the grain.
6. Japanese stab binding
Stab binding sews through the whole stack near the spine edge, so it binds single leaves, French folds and prints beautifully. The classic four-hole pattern has holes about 0.5 inch (12 mm) from the spine, with even spacing between the outer two.
The binding is sewn in passes: a running stitch down the holes, then back up, with the thread wrapping around the spine at every hole and around the head and tail at the ends. When you finish, every stretch of spine should show a stitch on both front and back.
A few rules that prevent most stab-binding failures:
- Clamp the stack with binder clips, cover to cover, before you pierce, and pierce straight down into a scrap board so the holes line up through every page.
- Use a thread about four times the spine length, waxed, so it does not tangle.
- Tension as you go. Pull each stitch along the spine, not away from it, so the holes do not tear.
- Check for gaps. If any stretch is missing a stitch on one side, you skipped a wrap.
The hole guides in the free template pack include actual-size stab-binding strips for 8.5-inch and 5.5-inch spines, and for A5 and A6.
7. Rubber band and twig
The fastest binding there is, and lovely for workshops. Cut a small notch at the head and tail of the fold, slip a rubber band around the outside of the spine so it sits in the notches, and push a twig, pencil or chopstick under the band on the inside of the centre spread. The band holds the pages; the twig holds the band.
Creep: why inner pages stick out
When you nest several folded sheets, the inner ones push out further at the fore-edge than the outer ones. This is called creep, and it becomes visible from about five sheets (20 pages) on ordinary paper.
Two fixes: trim the fore-edge flush after binding with a sharp knife and a metal ruler (a few sheets at a time) or ask a copy shop to guillotine the run, and keep text at least 0.25 inch from the fore-edge so trimming never cuts into it.
Which binding should you choose?
- Printing an edition of 20 or more? Long-reach staples. Fast, consistent, cheap.
- Making a handful of special copies? Pamphlet stitch, with coloured thread.
- Single-sided prints, a portfolio or a French-fold zine? Japanese stab binding.
- Teaching a group of children? Rubber band and twig, or staples done by an adult.
- A thick zine that will not fold? Side staples with a tape spine.
Go further
Actual-size hole guides for every sewn binding are in the free template pack, so you can pierce holes without measuring. The Complete Zine Making Handbook gives each of these seven bindings its own project, with numbered thread paths, knot diagrams and a troubleshooting table for every one.
Frequently asked questions
What is the easiest way to bind a zine?
For a folded booklet, a long-reach stapler is the easiest: lay the open booklet outside-up under the stapler and put two staples through the fold. Without a long-reach stapler, a rubber band hooked into two small notches at the ends of the fold binds a zine in seconds.
How do I staple a zine without a long-reach stapler?
Open an ordinary stapler fully, lay the booklet open over a piece of foam board or thick corrugated card, push the staple through the fold into the foam, then lift the booklet and fold the staple legs flat by hand from the inside.
How many staples does a zine need?
Two staples on the fold is standard for half-letter and A5 zines, placed about 2 inches (5 cm) from the head and tail. Quarter-letter zines often use two staples about 1 inch from each end. Very tall zines can take three.
What thread should I use to sew a zine?
Waxed linen or waxed polyester bookbinding thread is ideal. Embroidery floss or strong cotton thread also works; run it over a block of beeswax or a candle to stop tangling. Use a needle just large enough to carry the thread.
How many sheets can I staple in a zine?
A standard staple usually handles around 20 sheets of copy paper. A folded booklet of 5 to 10 sheets (20 to 40 pages) is comfortable. Thicker zines bind better with sewn or side bindings.